
Painting a wood house is more than just a cosmetic upgrade — it’s a vital step in protecting your home and boosting its curb appeal. Whether your wood siding looks faded, chipped, or just plain tired, a fresh coat of paint can transform your modren house into a stunning showpiece. If you’ve ever wondered how to paint a wooden house effectively, you’re in the right place.
Understanding Wood House Painting Basics
Painting wood houses requires more care than painting other surfaces, such as brick or vinyl. Wood is a natural, porous material that reacts to changes in weather, moisture, and pests. This means you need to prepare it properly and choose the right products to keep your paint job looking great and protect your home.
Why Wood Houses Need Special Care
Wood expands and contracts in response to changes in humidity and temperature. If painted incorrectly, the paint can crack or peel, leaving your wood vulnerable to rot and damage. Proper painting helps seal the wood, preventing moisture from seeping in.
Common Wood Types Used on Houses
Many homes feature wood siding made from:
- Cedar: Naturally resistant to insects and rot.
- Pine: Affordable but needs protective coatings.
- Redwood: Durable and holds paint well.
- Fir: Common and sturdy, but can absorb moisture.
Knowing your wood type helps you pick the right paint and prep methods.
Assessing Wood Condition Before Painting
Before you start, carefully inspect your wood for damage. Look for:
- Rot or soft spots
- Cracks or splits
- Warping or loose boards
These issues must be repaired or replaced to ensure a smooth, lasting paint finish.
Types of Paints and Finishes for Wood Exteriors
Wood house design usually require:
- Acrylic latex paints: Water-based, flexible, and breathable.
- Oil-based paints: Durable but less flexible, suitable for older homes.
- Stains and sealers: For natural wood looks, but require more upkeep.
Choosing the right finish affects both the appearance and protection of your product.
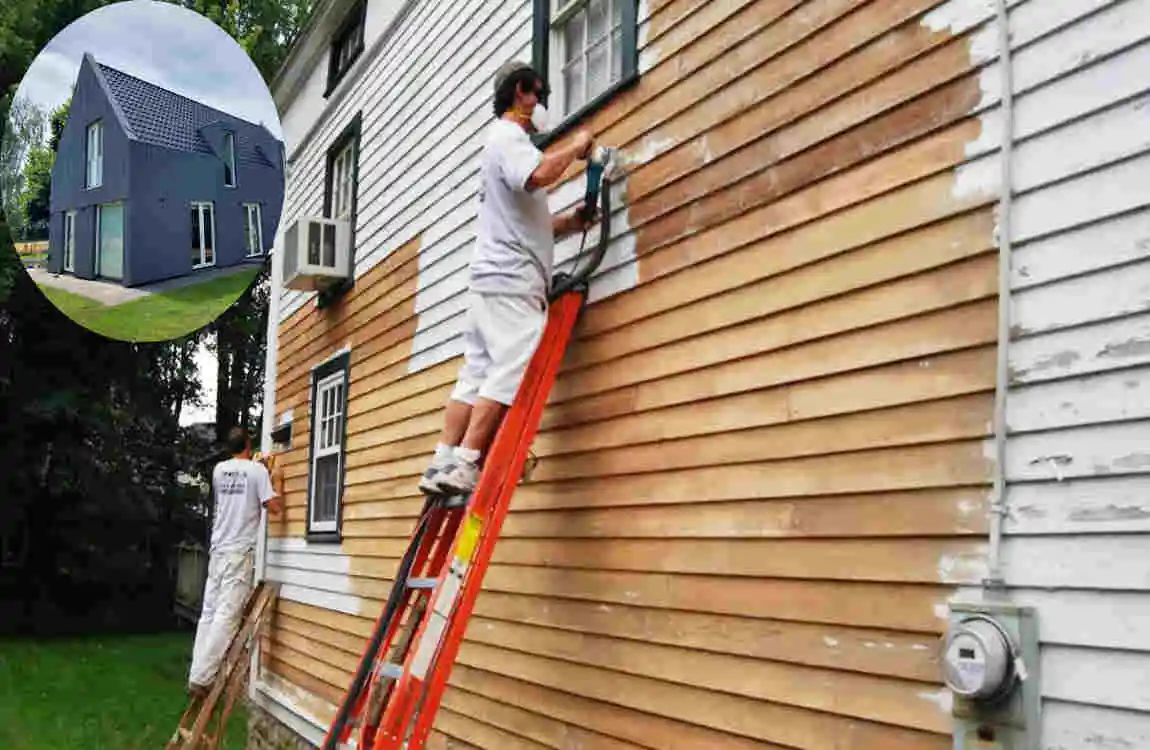
Preparing Your Wood House for Painting
Preparation is the foundation of a beautiful paint job. Skipping this step can lead to peeling paint and costly repairs down the road.
Inspecting Wood Surfaces
Start by examining every inch of your siding. Use a screwdriver or awl to poke suspicious areas — soft spots mean rot. Mark damaged spots for repair or replacement.
Cleaning the Wood Surface
Cleaning house your wood thoroughly to remove dirt, mildew, and old paint flakes. Use:
- A garden hose or power washer on a gentle setting.
- A mixture of water and mild detergent or specialized wood cleaner.
- A scrub brush for stubborn stains.
Let the wood dry completely before moving on.
Sanding Techniques
Sanding smooths rough spots and helps paint stick better. Use medium-grit sandpaper (80-120 grit) on rough areas and fine-grit sandpaper (180-220 grit) for a smooth finish. Be sure to sand the edges of old paint to prevent peeling.
Repairing Cracks and Holes
Fill any cracks, holes, or nail holes with exterior-grade wood filler. After it dries, sand the area smooth to blend with the surface.
Protecting Non-Paint Areas
Use painter’s tape to cover windows, doors, fixtures, and trim that you don’t want painted. Cover plants and ground areas with drop cloths.
Choosing the Right Paint and Supplies for Wood Houses
Selecting the right paint and tools makes your job easier and yields stunning results.
Recommended Paint Brands and Finishes
Look for brands known for exterior wood durability, like:
- Benjamin Moore Aura Exterior
- Sherwin-Williams Super Paint
- Behr Marquee Exterior
Choose satin or semi-gloss finishes for easy cleaning and good protection.
Primer Selection
Priming seals the wood and improves paint adhesion. Use a high-quality exterior wood primer compatible with your paint type. Primers block stains and tannins from bleeding through paint.
Essential Painting Tools
Equip yourself with:
- High-quality brushes (angled sash brushes for corners)
- Rollers with a 3/8-inch nap for smooth siding
- Paint sprayer for large areas (optional)
- Painter’s tape for clean edges
- Extension ladders or scaffolding for height
Step-by-Step Guide on How to Paint a Wood House
Now, let’s get to the painting process itself.
Apply Primer Evenly
Start by applying a thin, even coat of primer to all wood surfaces. Use a brush for corners and edges, and a roller or sprayer for larger areas. Primer ensures the paint sticks and lasts.
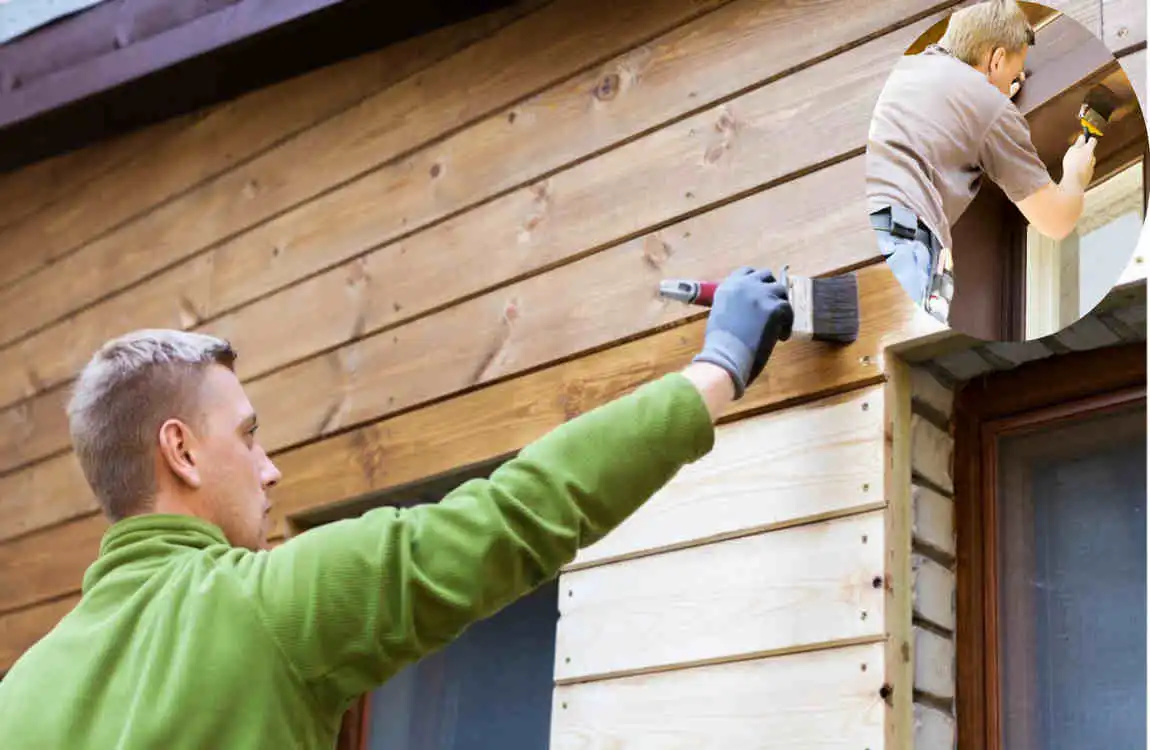
Painting Wood Siding Properly
Paint in the direction of the wood grain for a natural, seamless appearance. Use long, smooth strokes that overlap slightly with each pass. Avoid overloading your brushes or rollers to prevent drips.
Work in manageable sections to maintain a wet edge and avoid lap marks.
Number of Paint Coats
Two coats of paint are generally ideal for wood houses. The first coat provides coverage and sealing; the second adds depth and protection.
Drying Times and Weather
Allow primer to dry thoroughly (usually 4-6 hours). Paint coats typically require 4-8 hours of drying time, depending on the temperature and humidity.
Avoid painting in direct sunlight, very windy, or rainy conditions. Ideal weather is mild, dry, and overcast.
Final Inspection and Touch-Ups
After the paint dries, inspect for missed spots, drips, or uneven coverage. Use a fine brush to touch up the details.
Easy Tips for a Beautiful and Long-Lasting Finish
Maintain Consistent Paint Thickness
Apply paint evenly to avoid thin spots that wear quickly or thick spots that crack.
Avoid Common Mistakes
- Don’t paint over wet or dirty surfaces.
- Avoid painting in extreme temperatures.
- Don’t skip primer.
- Don’t rush drying times.
Best Weather and Timing
Spring and fall offer ideal mild temperatures. Avoid painting in summer heat or winter cold.
Handling Tricky Spots
Corners, trim, and window frames require smaller brushes and considerable patience. Use painter’s tape for sharp edges.
Using Painter’s Tools for Smooth Edges
Use angled sash brushes and steady hands for clean lines. Rollers help with large flat areas.
Caring for Your Painted Wood House Post-Painting
Maintenance and Cleaning
Wash your house gently with water and mild detergent once or twice a year to remove dirt and mildew.
Seasonal Maintenance
Inspect your paint in spring and fall for chips or cracks. Address issues promptly to prevent more significant problems.
When to Repaint
Signs you need to repaint:
- Paint peeling or flaking
- Wood is exposed or fading
- Water stains or mold
Protecting Your Paint
Trim bushes away from walls to avoid moisture buildup. Use UV-protective paint finishes and consider pest control if insects are a problem.