
Are you dreaming of a home that’s not only beautiful and unique but also environmentally friendly and cost-effective? If so, a cob house might be the perfect solution for you.
Cob houses are gaining popularity in the world of sustainable building, and for good reason. They’re made from natural, non-toxic materials, they’re energy-efficient, and they can be customized to fit your unique style and needs. Now that you know why cob is appealing, let’s explore what exactly a cob house is and how the method has stood the test of time.
What Is a Cob House?
Definition and History of Cob Building
A cob house is a structure made from a mixture of clay, sand, straw, and water, commonly referred to as “cob.” This ancient building technique has been used for centuries, with evidence of cob structures dating back to the 11th century in England.
Materials Used in Cob Construction
The primary materials used in cob construction are:
- Clay
- Sand
- Straw
- Water
These natural materials are mixed together to create a pliable, sculptable substance that can be shaped into walls and other structural elements.
Key Features and Advantages
Cob houses offer several key advantages:
- Eco-friendly: Made from abundant, non-toxic natural materials.
- Cost-effective: Building with cob can be more affordable than traditional construction methods, especially when sourcing materials locally.
- Durable: When properly constructed and maintained, cob houses can last for centuries.
- Aesthetic appeal: Cob allows for unique, sculptural designs that can be customized to your taste.
Environmental Benefits
One of the main reasons people choose to build cob houses is their environmental benefits. Cob is made from natural, non-toxic materials that have a low environmental impact. By building with cob, you’re reducing your carbon footprint and creating a healthy living environment for yourself and your family.
Cost Savings
Compared to conventional homes, cob houses can be more cost-effective to build. The materials are often readily available and inexpensive, and you can save money on labor by doing much of the work yourself. Plus, cob houses are energy-efficient, which can lead to long-term savings on utility bills.
Unique Design Flexibility
One of the most exciting aspects of building a cob house is the design flexibility it offers. Cob can be sculpted into any shape or form, allowing you to create a truly unique and personalized home. Whether you want curved walls, built-in furniture, or intricate architectural details, cob makes it possible.
Thermal Efficiency and Insulation
Cob houses are known for their excellent thermal mass, which helps regulate temperature and reduce the need for heating and cooling. The thick walls of a cob house act as insulation, keeping the interior warm in winter and cool in summer. This can lead to significant energy savings over time.
Longevity and Maintenance
When properly constructed and maintained, cob houses can last for centuries. The natural materials used in cob construction are durable and resistant to many common forms of deterioration. With regular maintenance and repairs, your cob house can provide a comfortable and sustainable home for generations to come.
Planning Your Cob House Project
Assessing Your Needs and Budget
Before you begin building your cob house, it’s important to assess your needs and budget. Consider factors such as:
- The size and layout of your home
- The number of bedrooms and bathrooms you need
- Any special features or amenities you want to include
- Your overall budget for the project
By taking the time to plan and budget, you can ensure that your cob house project stays on track and within your means.
Choosing the Right Location and Site Preparation
The location of your cob house is crucial for its success. Look for a site that:
- Has good drainage and is not prone to flooding
- It is protected from strong winds and extreme weather.
- Has access to utilities such as water and electricity
- Is zoned for residential construction
Once you’ve chosen your site, you’ll need to prepare it for construction. This may involve clearing vegetation, leveling the land, and marking out the foundation layout.
Understanding Local Building Codes and Permits
Before you begin building your cob house, it’s important to research and understand the local building codes and permit requirements in your area. Some jurisdictions may have specific regulations for cob construction, while others may not allow it at all.
Make sure to obtain any necessary permits and approvals before you start building, and be prepared to work with local authorities to ensure that your cob house meets all relevant standards and regulations.
Designing Your Cob House: Tips and Tools
Designing your cob house is an exciting and creative process. Here are some tips to help you get started:
- Start with a sketch: Begin by sketching out your ideas for the layout and design of your cob house. Don’t worry about being perfect – this is just a starting point.
- Use design software: There are many software programs available that can help you create detailed plans and 3D models of your cob house. These can be especially helpful if you’re working with a builder or architect.
- Consider your climate: The design of your cob house should take into account the local climate and weather patterns. For example, if you live in a hot, sunny area, you may want to incorporate features like thick walls and overhangs to help keep your home cool.
- Think about your lifestyle: Your cob house should be designed to meet your specific needs and lifestyle. Consider factors like the number of bedrooms and bathrooms you need, the size and layout of your kitchen and living areas, and any special features or amenities you want to include.
Sourcing Cob Building Materials Locally
One of the great things about building with cob is that the materials are often readily available and inexpensive. You can source your cob building materials locally by:
- Finding a local clay source: Look for clay deposits in your area, such as those found in riverbanks or hillsides. You can also purchase clay from a local supplier if needed.
- Using local sand: Sand is another key ingredient in cob, and it can often be found at local quarries or beaches. Make sure to use sand that is clean and free of organic matter.
- Sourcing straw: Straw is used to add strength and stability to the cob mixture. You can often find straw at local farms or agricultural supply stores.
- Using rainwater: Water is the final ingredient in cob, and you can use rainwater collected from your roof or other sources. Just make sure it’s clean and free of contaminants.
By sourcing your cob building materials locally, you can save money and reduce your environmental impact.
Preparing the Building Site
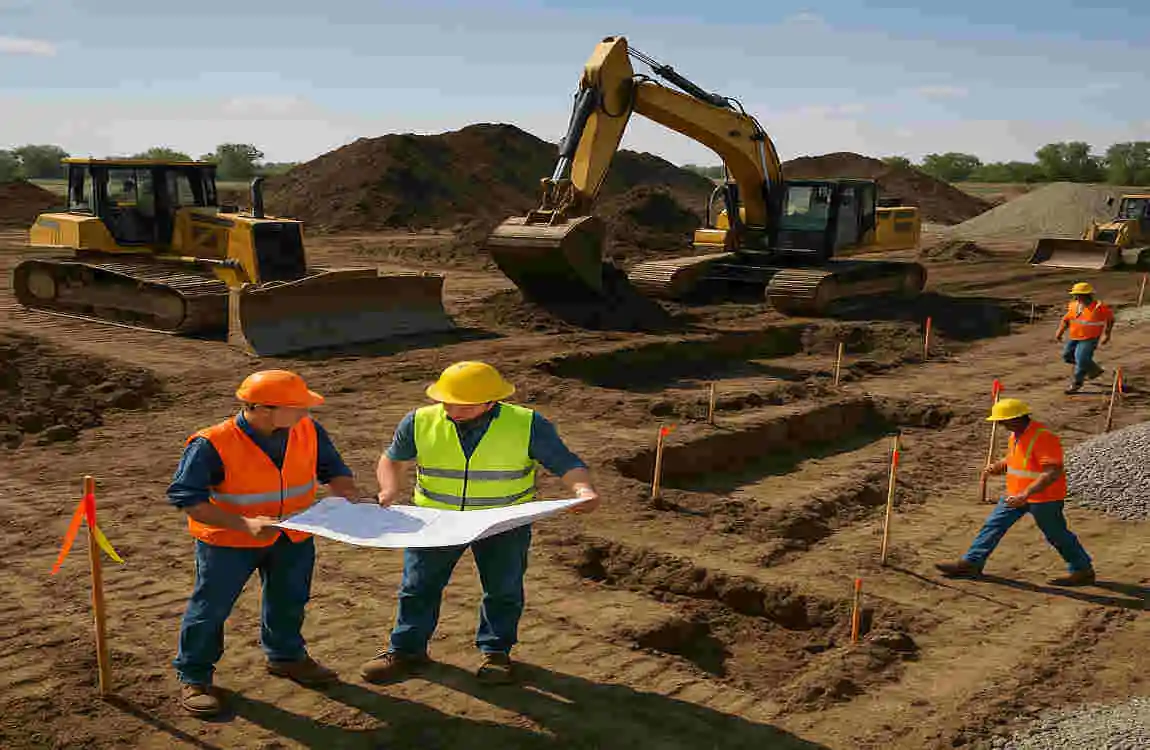
Clearing and Leveling the Land
The first step in building your cob house is to prepare the building site. This involves clearing the land of any vegetation, rocks, or debris, and leveling it to create a stable and even surface for your foundation.
Start by removing any trees, bushes, or other plants from the site. You can use a chainsaw, axe, or other tools to cut down larger vegetation, and a shovel or hoe to remove smaller plants and roots.
Once the site is clear, you’ll need to level the land. This can be done using a shovel, rake, and tamper to move and compact the soil. Make sure to create a level surface that’s free of any dips or bumps that could affect the stability of your foundation.
Marking Out the Foundation Layout
Once the land is cleared and leveled, you can begin marking out the layout of your foundation. Use stakes and string to mark the corners and edges of your foundation, making sure to follow your design plans closely.
Double-check your measurements and make any necessary adjustments before you start digging. It’s important to get the foundation layout right, as it will serve as the base for your entire cob house.
Importance of Drainage and Water Management
Proper drainage and water management are crucial for the success of your cob house. Cob is a natural material that can be sensitive to moisture, so it’s important to take steps to protect your home from water damage.
Start by assessing the natural drainage patterns on your site. Look for any low spots or areas where water tends to collect, and take steps to improve drainage in these areas. This may involve grading the land, installing drainage pipes, or creating swales or French drains.
You should also consider the placement of your cob house in relation to water sources. Make sure to keep your home a safe distance away from any streams, rivers, or other bodies of water that could cause flooding or erosion.
By taking the time to properly manage drainage and water on your site, you can help ensure the longevity and durability of your cob house.
Laying the Foundation
Types of Foundations for Cob Houses
There are several types of foundations that can be used for cob houses, including:
- Stone foundations: Stone foundations are a popular choice for cob houses, as they provide a strong and durable base for the walls. They can be made from locally sourced stone and can be either dry-stacked or mortared.
- Rubble trench foundations: Rubble trench foundations involve digging a trench and filling it with rubble, such as broken stone or concrete. This type of foundation is less expensive than a stone foundation, but still provides good support for the cob walls.
- Concrete foundations: Concrete foundations are another option for cob houses, although they are less common due to their higher environmental impact. They can be poured in place or made from precast concrete blocks.
The type of foundation you choose will depend on factors such as your budget, the availability of materials, and the soil conditions on your site. Consult with a professional if you’re unsure which type of foundation is best for your cob house.
Step-by-Step Foundation Construction
Once you’ve chosen the type of foundation for your cob house, you can begin the construction process. Here’s a step-by-step guide to laying a stone foundation:
- Dig the foundation trench: Start by digging a trench around the perimeter of your cob house. The trench should be at least 12 inches wide and 18 inches deep, although the exact dimensions may vary depending on your specific design and soil conditions.
- Lay the first course of stones: Begin by laying the first course of stones in the trench. Make sure to use large, flat stones that are well-seated and level. You can use a level and a string line to ensure that the stones are properly aligned.
- Fill in the gaps: Once the first course of stones is in place, fill in any gaps between the stones with smaller stones or rubble. This will help to create a solid and stable base for your foundation.
- Add subsequent courses: Continue adding courses of stones, making sure to stagger the joints between the stones for added stability. You can use a mortar mix to hold the stones together, or you can dry-stack them if you prefer.
- Backfill the trench: Once the foundation is complete, backfill the trench with soil or gravel to provide additional support and stability.
Waterproofing and Moisture Barriers
To protect your cob walls from moisture damage, it’s important to incorporate waterproofing and moisture barriers into your foundation. This can be done by:
- Applying a waterproofing membrane: You can apply a waterproofing membrane, such as a liquid rubber or bituminous coating, to the exterior of your foundation. This will help to prevent water from seeping into the foundation and damaging your cob walls.
- Installing a French drain: A French drain is a trench filled with gravel that helps to redirect water away from your foundation. You can install a French drain around the perimeter of your cob house to help manage moisture and prevent water damage.
- Using a moisture barrier: A moisture barrier, such as a layer of plastic sheeting or a specialized membrane, can be installed between the foundation and the cob walls. This will help to prevent moisture from rising up through the foundation and into the walls.
By taking these steps to waterproof and protect your foundation, you can help ensure the longevity and durability of your cob house.
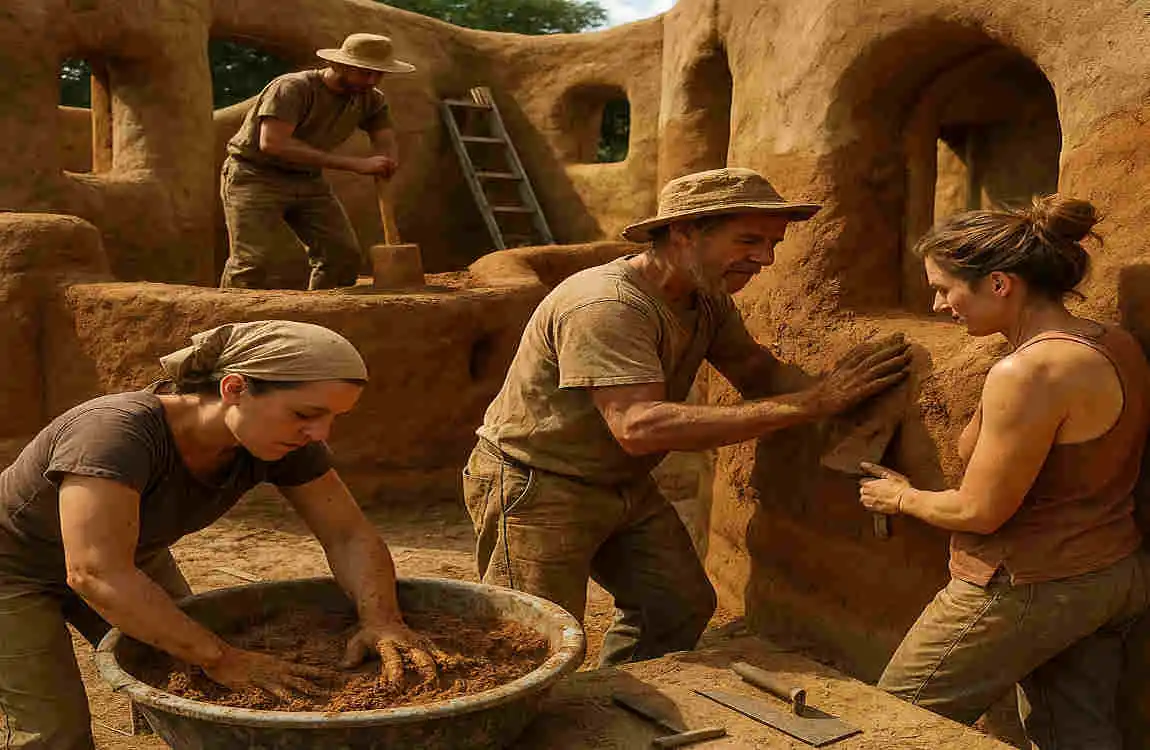
Creating the Cob Mix
Ingredients: Clay, Sand, Straw, Water
The cob mix is the heart of your cob house, and it’s made from a simple combination of natural ingredients:
- Clay: Clay is the primary binding agent in cob, and it helps to hold the mixture together. You can source clay from local deposits or purchase it from a supplier.
- Sand: Sand adds bulk and stability to the cob mix, and it helps to prevent cracking. Make sure to use clean, well-graded sand that’s free of organic matter.
- Straw: Straw is added to the cob mix to provide additional strength and stability. It helps to reinforce the mixture and prevent cracking as it dries.
- Water: Water is used to moisten the cob mix and make it pliable and workable. You can use clean water from any source, such as a well or a municipal supply.
The exact proportions of these ingredients can vary depending on factors such as the type of clay you’re using and the climate in your area. A general starting point is to use a mix of about 1 part clay, 2 parts sand, and 1 part straw, with enough water to create a pliable and workable mixture.
How to Test and Balance Your Cob Mixture
Before you start building with your cob mix, it’s important to test and balance it to ensure that it has the right consistency and properties. Here’s how to do it:
- Mix a small batch: Start by mixing a small batch of cob, using the proportions mentioned above. Mix the ingredients together thoroughly, adding water as needed to create a pliable and workable mixture.
- Test the mixture: To test the mixture, take a handful of cob and squeeze it in your fist. The cob should hold its shape when you open your hand, but it should also be easy to break apart with your fingers. If the cob is too wet and sticky, add more sand or straw to balance it out. If it’s too dry and crumbly, add more water or clay.
- Make adjustments: Based on the results of your test, make any necessary adjustments to your cob mix. Keep testing and adjusting until you have a mixture that’s just right – pliable and workable, but not too wet or dry.
By taking the time to test and balance your cob mix, you can ensure that it will perform well when you start building your cob house.
Mixing Techniques: Manual vs. Mechanical
There are two main techniques for mixing cob: manual mixing and mechanical mixing.
- Manual mixing: Manual mixing involves using your hands, feet, or simple tools to mix the cob ingredients together. This can be a labor-intensive process, but it allows you to have more control over the consistency and quality of the mix. To manually mix cob, start by combining the dry ingredients (clay, sand, and straw) in a pile on a tarp or in a mixing pit. Gradually add water, mixing and kneading the ingredients together until you have a pliable and workable mixture.
- Mechanical mixing: Mechanical mixing involves using a machine, such as a cement mixer or a specialized cob mixer, to combine the cob ingredients. This can be a faster and more efficient process than manual mixing, especially for larger projects. To mechanically mix cob, start by adding the dry ingredients to the mixer, then gradually add water while the machine is running. Mix the ingredients together until you have a consistent and workable mixture.
The choice between manual and mechanical mixing will depend on factors such as the size of your project, your budget, and your personal preferences. Both techniques can produce high-quality cob, so it’s up to you to decide which one is best for your needs.
Tips for Maintaining Consistency in Your Mixture
Maintaining consistency in your cob mixture is key to ensuring the quality and durability of your cob house. Here are some tips to help you achieve and maintain consistency:
- Use a consistent recipe: Stick to a consistent recipe for your cob mix, using the same proportions of ingredients each time you mix a batch. This will help to ensure that your cob has consistent properties and performance throughout your project.
- Mix thoroughly: Make sure to mix your cob ingredients thoroughly, whether you’re using a manual or mechanical technique. This will help to ensure that the ingredients are evenly distributed and that your cob has a consistent texture and consistency.
- Test regularly: Regularly test your cob mix to ensure that it’s maintaining the right consistency and properties. If you notice any changes or inconsistencies, make adjustments as needed to get your mix back on track.
- Protect your mix from the elements: Cob can be sensitive to changes in temperature and humidity, so it’s important to protect your mix from the elements while you’re working. Cover your cob with tarps or sheets when it’s not in use, and store it in a cool, dry place to prevent it from drying out or becoming too wet.
By following these tips and maintaining consistency in your cob mixture, you can ensure that your cob house will be strong, durable, and long-lasting.
Building the Walls
Building Wall Forms and Supportive Structures
Before you start applying cob to your walls, you’ll need to build wall forms and supportive structures to help hold the cob in place as it dries. Here’s how to do it:
- Build the wall forms: Wall forms are temporary structures that help to shape and support your cob walls as they’re being built. You can make wall forms from a variety of materials, such as wood, metal, or plastic. To build your wall forms, start by measuring and cutting the materials to the desired height and length of your walls. Assemble the forms using screws, nails, or other fasteners, making sure to create a sturdy and stable structure.
- Install the supportive structures: In addition to wall forms, you may also need to install supportive structures to help bear the weight of your cob walls. These can include things like wooden or metal braces, scaffolding, or temporary supports. Make sure to install these structures securely and in accordance with your design plans.
Applying the First Layer of Cob (Footing Layer)
The first layer of cob you apply to your walls is called the footing layer, and it serves as the base for the rest of the wall. Here’s how to apply the footing layer:
- Prepare the foundation: Before you start applying cob, make sure that your foundation is clean, dry, and free of any debris or loose material. This will help to ensure a strong and stable bond between the foundation and the cob walls.
- Mix the cob: Mix a batch of cob using the recipe and techniques described earlier. Make sure that the cob is pliable and workable, but not too wet or dry.
- Apply the cob: Start by applying a thin layer of cob to the foundation, using your hands or a trowel to spread it evenly. This first layer should be about 1-2 inches thick, and it should cover the entire surface of the foundation.
- Compact the cob: Once the first layer of cob is in place, use your hands or a tool to compact it firmly against the foundation. This will help to create a strong and stable bond between the cob and the foundation.
- Add subsequent layers: Once the footing layer is in place and has started to dry,